Understanding the Silver Making Workshop Environment
Walking into a silver making workshop for the first time can feel overwhelming if you don’t know what to expect. Unlike many craft classes that focus on lighter materials or quick projects, silversmithing demands respect for both the craft and the workspace itself. A professional silver making workshop is a shared environment where multiple students work simultaneously with specialized equipment, open flames, and materials that require careful handling. The atmosphere tends to be focused and purposeful—instructors maintain high safety standards, and experienced makers move with intentional precision around their workstations. Understanding this culture before you arrive helps you integrate smoothly into the community and approach your learning with appropriate mindfulness. Most workshops, particularly those following the folk school tradition found throughout Vermont and New England, emphasize both technical skill development and respect for the materials. You’ll find yourself in a space where craftsmanship matters deeply, where mistakes become learning opportunities, and where the collective energy of makers working toward mastery creates an inspiring environment.
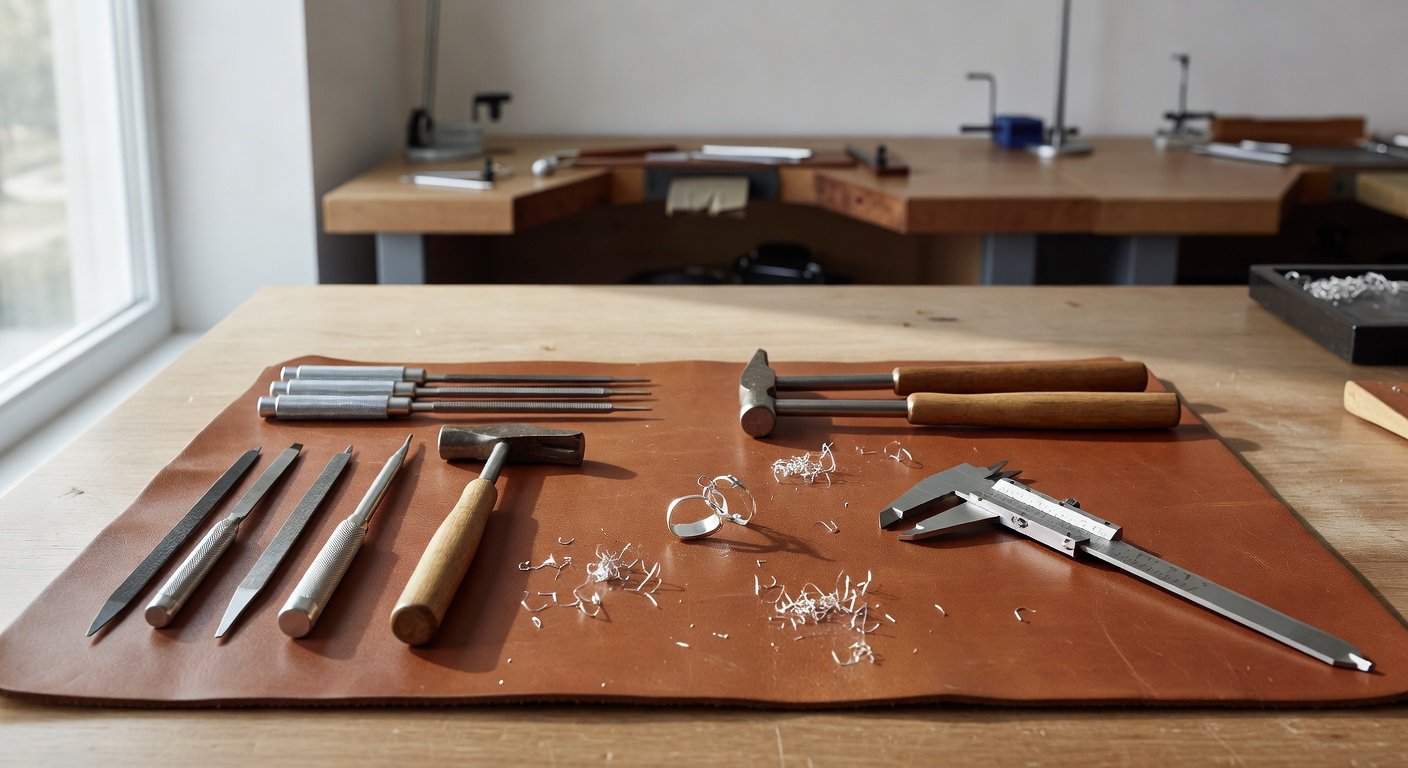
The physical layout of a silver making workshop typically includes individual workbenches equipped with jeweler’s benches or tables, communal equipment stations for larger tools like kilns or polishing equipment, and safety stations with first aid supplies and fire extinguishers. Lighting is crucial in silversmithing—expect bright, focused task lighting at each station so you can see fine details. The workshop will likely have designated areas for different processes: a soldering station with ventilation, a finishing area with polishing equipment, and storage for materials and works in progress. Temperature and humidity matter too, as metal responds to environmental conditions. Professional workshops maintain relatively stable conditions to ensure consistent results. The noise level can be surprising to newcomers—hammering, filing, and grinding create a constant but rhythmic soundscape. This sensory environment is part of the authentic craft experience, and many makers find it deeply satisfying once they acclimate.
Essential Tools and Materials You’ll Need to Bring
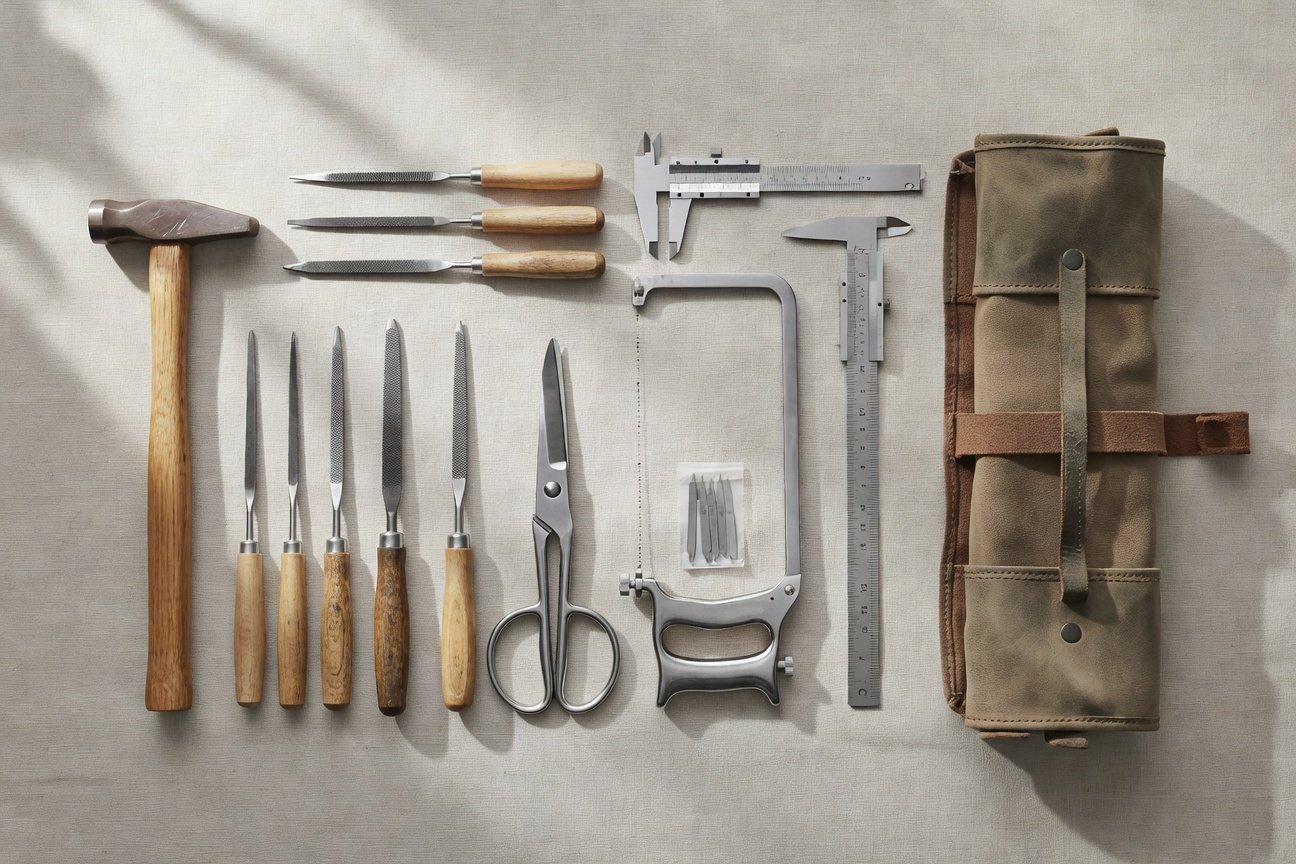
Most silver making workshops provide the major equipment—kilns, torches, and benches—but instructors expect students to bring personal hand tools and materials. This is standard practice in serious craft education and reflects the professional nature of the work. Your personal toolkit becomes an extension of your craftsmanship, and having quality tools makes an immediate difference in your results and comfort level. Many instructors provide a detailed list of required items before your first class, but understanding why each tool matters helps you make informed purchasing decisions. Quality hand tools represent a modest investment, typically $100–$300 for a starter kit, but they’re tools you’ll use for years if you continue with the craft. Rather than buying random items, consider purchasing a curated beginner’s silversmithing kit from reputable craft suppliers—these bundles are thoughtfully assembled and often cost less than buying individual tools. Look for kits that include jeweler’s files, various hammers, metal shears, a jeweler’s saw with blades, calipers, and measuring tools. You’ll also need safety equipment: an apron, closed-toe shoes, and eye protection. Many workshops require these items for liability and safety reasons.
Beyond hand tools, you’ll need to purchase silver materials for your projects. Most workshops sell materials on-site or have preferred suppliers, but confirm this before attending. Silver comes in various forms—sheet, wire, tubing, and findings—and the specific materials depend on your project. Budget an additional $50–$150 for materials during your first workshop, depending on project scope. Bring a notebook and pen for taking notes on techniques, measurements, and instructor feedback. Many makers maintain detailed workshop journals that become invaluable references as they develop their practice. Consider bringing a small flashlight or headlamp for examining fine details, particularly if you’re working with intricate designs. Some workshops have limited workspace, so bringing a small organizer or container for your personal tools keeps your station neat and prevents lost items. Finally, bring water and snacks—silversmithing is physically demanding, and staying hydrated and fueled improves both your focus and safety.
Recommended Starter Tool Kits
Investing in a quality starter kit streamlines your preparation and ensures you have compatible, reliable tools from the beginning. Professional-grade silversmithing kits typically include a jeweler’s hammer with a flat and rounded head, various files for shaping and finishing, metal shears or tin snips for cutting sheet silver, a jeweler’s saw frame with assorted blades, calipers for precise measurements, a steel ruler or straightedge, and a bench pin or work surface clamp. Many reputable craft suppliers offer kits specifically designed for workshop students, with tools selected by experienced instructors. These kits often cost $120–$250 and represent better value than purchasing individual items. When evaluating kit options, prioritize tool quality over quantity—a smaller kit with excellent tools serves you better than a large kit with mediocre items. Look for kits that include a storage case or roll, which protects your investment and keeps tools organized during transport to and from the workshop. Reading reviews from other workshop students provides valuable insight into which kits have proven durable and effective.
Safety Protocols and What to Expect
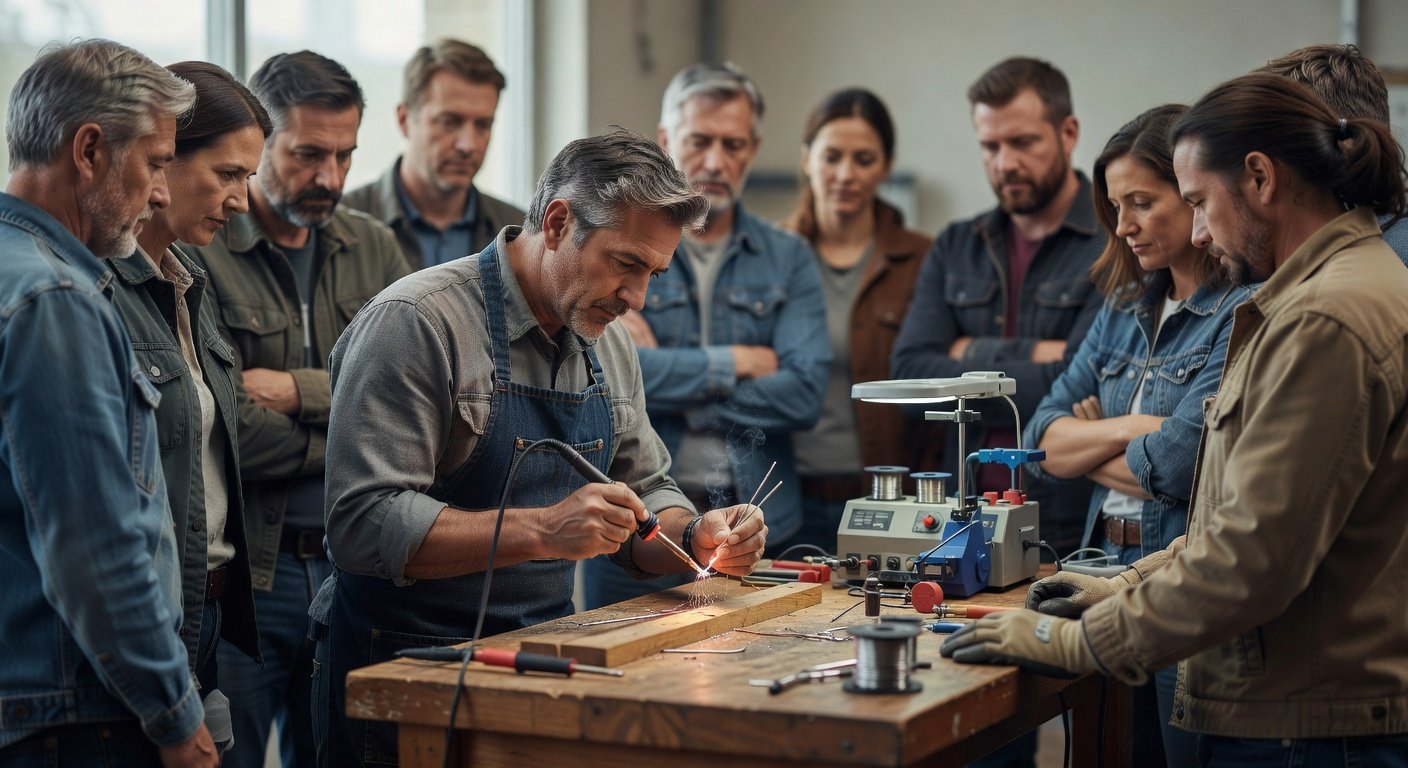
Safety is paramount in any silver making workshop, and instructors take this responsibility seriously. Expect a comprehensive safety orientation during your first session, covering equipment operation, fire safety, proper ventilation, and emergency procedures. Most workshops require students to sign safety waivers acknowledging the risks inherent in working with open flames, sharp tools, and hot materials. This isn’t bureaucratic formality—it reflects the genuine hazards of the craft. Common safety concerns in silversmithing include burns from torches and hot metal, cuts from sharp tools and saw blades, eye injuries from flying particles, and respiratory exposure to fumes during soldering. Professional workshops address these through proper ventilation systems, required eye protection, heat-resistant aprons, and strict protocols around torch and kiln use. You’ll learn proper handling techniques for every tool and equipment piece, and instructors will observe your technique closely until they’re confident you can work safely independently. Expect to feel slightly nervous around the torch or kiln during your first few sessions—this is normal and healthy. Respect for the tools and materials is the foundation of safe practice.
Beyond equipment safety, workshops establish behavioral protocols that protect everyone. This includes keeping pathways clear, storing materials properly, cleaning up spills immediately, and respecting others’ workspace and projects. Many workshops implement a ‘clean as you go’ culture where students maintain their stations throughout the session. Jewelry-making creates fine metal dust and filings, which must be properly disposed of—never down the drain. Most workshops have designated collection containers for metal waste, which is often recycled. You’ll also learn about proper ventilation during soldering, as flux fumes can be irritating. If you have respiratory sensitivities or allergies, inform your instructor before the workshop begins so accommodations can be made. Fire safety is taken seriously—you’ll learn where fire extinguishers are located and how to use them, though instructors handle emergency situations. Understanding and respecting these protocols from day one marks you as a serious student and contributes to a safe, productive learning environment for everyone.
How a Typical Silver Making Workshop Day is Structured
Most silver making workshops follow a consistent daily structure that balances instruction, hands-on practice, and breaks. A typical full-day workshop (usually 9 AM to 4 PM with a lunch break) begins with a brief gathering where the instructor introduces the day’s project, demonstrates key techniques, and reviews safety considerations. This opening session typically lasts 30–45 minutes and sets the tone for focused work ahead. You’ll see your instructor demonstrate a technique slowly and deliberately, often repeating steps multiple times so students can absorb the details. Take notes during demonstrations—even experienced makers reference their notes. After the demonstration, students move to individual workstations to begin their own work. The instructor circulates continuously, observing technique, answering questions, and providing individual feedback. This is the heart of the workshop experience: hands-on practice with expert guidance readily available. Expect to spend 2–3 hours in this focused work period before a mid-morning break. The break provides time to step back, rest your eyes and hands, and reflect on your progress. Many makers use breaks to observe other students’ work and learn from their approaches.
After the mid-morning break, the workshop typically resumes with either continued work on the morning project or introduction of the next technique or project phase. Instructors often build projects across multiple days or sessions, so you might spend the morning on forming techniques and the afternoon on soldering or finishing. Around midday, there’s usually a lunch break (30–60 minutes), which gives you time to eat, rest, and mentally reset. The afternoon session follows a similar pattern: instruction or demonstration, hands-on practice, and instructor feedback. As the day concludes, there’s typically a 15–30 minute wrap-up session where students present their work, discuss challenges and solutions, and preview the next session’s focus. This community reflection reinforces learning and builds camaraderie among students. By the end of your first workshop day, you’ll likely feel both exhilarated and tired—silversmithing demands mental focus and physical engagement simultaneously. Plan to rest after your first workshop; your hands and mind will need recovery time.
Managing Physical Demands and Fatigue
Silversmithing is more physically demanding than many people anticipate. Hammering, filing, and holding precise positions at your workbench engages your shoulders, arms, hands, and core. Students often experience hand fatigue, particularly during their first few sessions, as they build stamina and develop proper technique. This is completely normal and improves with practice as your muscles adapt and your technique becomes more efficient. Expect to feel soreness in your hands and forearms after your first workshop—similar to the soreness you’d feel after starting a new exercise routine. Proper ergonomics matter significantly; instructors will guide you on workbench height, posture, and tool handling to minimize strain. Take breaks when your hands tire—pushing through fatigue increases injury risk and decreases quality. Stay hydrated throughout the day, as dehydration contributes to muscle fatigue and reduces focus. Wear comfortable, supportive shoes, as you’ll be standing most of the day. If you have pre-existing hand, wrist, or shoulder issues, discuss these with your instructor before the workshop begins so modifications can be made.
What to Wear and Practical Preparation
Appropriate clothing protects you and shows respect for the workshop environment. Wear closed-toe shoes with good support—sandals, flip-flops, and heels are unsafe around hot materials and sharp tools. Many workshops require closed-toe shoes explicitly. Choose clothing that covers your arms and legs; loose, flowing fabrics can catch on equipment, so fitted clothing works better. Avoid synthetic fabrics that melt easily; natural fibers like cotton are safer around heat sources. Long hair should be tied back securely—this is a safety requirement in most workshops. Remove dangling jewelry, watches, and rings before arriving; these can catch on tools or be damaged by metal dust and heat. Bring an apron, preferably heat-resistant leather or canvas, to protect your clothing from metal dust, flux stains, and potential splashes. Many workshops sell or provide aprons, but bringing your own ensures it fits properly. Wear glasses or contacts if you normally do; vision is critical in silversmithing. Safety glasses will be provided, but they must fit over your regular glasses if you wear them. Bring a small towel or cloth for wiping your hands and tools throughout the day—metal dust accumulates quickly.
Practical preparation extends beyond clothing to mindset and logistics. Arrive 10–15 minutes early for your first session to locate parking, find the workshop space, and settle in without rushing. Bring your phone and charger, but plan to keep it in your bag during workshop time—focus and safety require minimal distractions. If you’re attending a multi-day workshop or series, plan your transportation and meals in advance. Many workshops in Vermont and New England are located in rural areas where nearby food options are limited; packing lunch or snacks ensures you have what you need. Bring water in a reusable bottle rather than relying on workshop facilities. If you’re traveling from a distance, research accommodations near the workshop location. Many craft schools have partnerships with local inns or provide housing information. Finally, get adequate sleep before your first workshop—you’ll be learning new skills and engaging physically, and rest improves both performance and safety. Approach your first workshop with curiosity and patience; you’re beginning a journey into a craft with centuries of tradition and contemporary relevance.
Building Relationships and Getting the Most From Your Experience
A silver making workshop is as much about community as it is about technique. You’ll be learning alongside other adult makers at various skill levels, and these connections often extend beyond the workshop itself. Introduce yourself to fellow students during breaks and lunch; many workshop friendships develop into ongoing creative partnerships or study groups. Ask questions freely—instructors expect questions and view them as signs of engaged learning. Don’t hesitate to ask for additional demonstrations or clarification if a technique isn’t clicking; good instructors appreciate students who advocate for their own learning. Observe how experienced students approach problems; watching skilled makers work teaches you as much as formal instruction. Take photos of your work at various stages, and ask permission to photograph other students’ projects if you’d like to reference them later. This visual record becomes invaluable as you continue your practice. Exchange contact information with students you connect with; many makers maintain networks of peers they consult with on techniques and projects. Respect the instructor’s expertise and experience; they’ve spent years or decades developing their craft and are generously sharing that knowledge. Show appreciation through attentiveness, effort, and a willingness to embrace feedback.
Getting the most from your workshop experience requires intentional reflection and follow-up. On the evening of your first workshop day, review your notes while details are fresh and identify techniques you want to practice further. Take photos of any written instructions or demonstrations you want to remember. If you didn’t complete your project during the workshop, ask your instructor about finishing it at home or during a subsequent session. Many workshops encourage students to continue working on projects between sessions. Set realistic expectations for your first pieces—they won’t be perfect, and that’s entirely appropriate. Every silversmith has early pieces that taught valuable lessons through imperfection. If you’re considering continuing with silversmithing, discuss ongoing learning options with your instructor—many offer follow-up classes, open studio time, or mentorship opportunities. The folk school tradition emphasizes lifelong learning and community, so your first workshop is ideally the beginning of an ongoing engagement with the craft rather than a standalone experience.
Preparing Your Workspace at Home
While your primary learning happens in the workshop, preparing a basic workspace at home extends your practice and reinforces what you’re learning. You don’t need an elaborate setup—many makers begin with a small corner of a table or desk where they can safely practice techniques without heat or flames. A jeweler’s bench pin, which clamps to a table edge, creates a dedicated work surface for filing, sawing, and shaping. Ensure your home workspace has good lighting; a desk lamp or headlamp makes detail work possible. Organize your tools in a small container or toolbox so they’re accessible and protected. Keep your notebook nearby to reference techniques and measurements. If you have space and interest, you might eventually set up a small soldering station at home, but this requires proper ventilation and safety equipment—discuss home setup options with your instructor before attempting any torch work at home. Many workshops discourage students from soldering at home until they have substantial experience and proper equipment. Starting with cold techniques—filing, shaping, and assembly without heat—is a safe way to practice and develop muscle memory. Your home workspace doesn’t replace the workshop; rather, it extends your learning and keeps your skills sharp between sessions.
Frequently Asked Questions
Do I need to have any prior experience before attending a silver making workshop?
No prior experience is necessary. Silver making workshops are designed for complete beginners and typically start with fundamental techniques. Instructors expect to teach everything from basic tool use to metal properties. Your willingness to learn and follow safety protocols matters far more than previous experience. Many workshops offer beginner-specific sessions, so you’ll be learning alongside others at your level.
What is the typical cost of a silver making workshop, and what does it include?
Workshop costs vary widely depending on location, duration, and instructor experience, typically ranging from $200–$800 for a full-day or multi-day session. Most workshops include instruction, use of major equipment, and workspace, but materials and personal tools are usually separate costs. Always confirm what’s included before registering. Many workshops offer discounts for multiple sessions or early registration.
Can I bring my own tools, or should I purchase new ones?
You should bring your own hand tools, as workshops expect this. Most instructors provide specific tool lists before your first session. If you’re new to silversmithing, purchasing a beginner’s kit from a reputable supplier is more practical than buying individual tools. Quality matters—invest in reliable tools that will last rather than cheap alternatives that frustrate learning.
What safety equipment is required, and will the workshop provide it?
Safety equipment typically includes an apron, closed-toe shoes, and eye protection. Most workshops provide safety glasses but expect you to bring an apron and appropriate footwear. Some workshops sell safety equipment on-site if you forget items. Always ask about specific safety requirements when registering, as requirements vary by workshop and instructor.
How long does it take to complete a project in a silver making workshop?
Project completion time varies dramatically based on complexity and your experience level. Simple projects like a basic ring or pendant might be completed in a single workshop day, while more intricate pieces may span multiple sessions. Instructors design projects to fit workshop timeframes, so you’ll likely complete something tangible during your first session, even if it’s a simpler piece than you might eventually create.
Ready to Begin Your Silver Making Journey?
Your first silver making workshop is an investment in yourself and a connection to a centuries-old craft tradition. Whether you’re exploring silversmithing as a new hobby or considering it as a serious artistic practice, proper preparation ensures you’ll have a safe, rewarding experience. Review the guidance above, gather your tools and materials, and approach your workshop with curiosity and respect for the craft. If you have specific questions about a workshop you’re planning to attend, reach out to the instructor directly—they’re invested in your success and happy to address concerns. The silversmithing community welcomes thoughtful, committed learners. Your first workshop is just the beginning.